I've been working with the Rust and Revolutions kit from Bee Happy Stationery to make this steampunk style folio. The papers are beautiful, lots of script, clocks and gears, not to mention the characters themselves. I've made lots of tucks and pockets from the elements included in the kit and cut sections of the pages to form a couple of waterfalls.
Sunday, 23 August 2026
Rust and Revolutions Folio
Sunday, 2 August 2026
Gilded Peacock Journal
This is a flip through of a journal I've made for the Bee Happy Stationery design team, using the beautiful Gilded Peacock kit. The kit is available from Bee Happy Stationery's Ko-fi store
I love the rich colours and jewel tones. This really is a gorgeous kit to work with.
Tuesday, 30 June 2026
Envelope Flip Folio
Here's my second Design Team project using the gorgeous Bunny Spring Meadow kit from Bee Happy Stationery. The meadow backgrounds are so pretty, and I love the beautiful bunnies with their flower crowns.
The folio itself is made from four envelopes of varying sizes glued on alternate sides of the base envelope, making five in total. I've trimmed the tops of the flap envelopes to make pockets for the pretty journalling cards in the kit. The top envelope is held closed with a velcro dot.
Saturday, 6 June 2026
Double Vision cards
It's been such a long time since I posted (hangs head in shame) but I've just joined Bee Happy Stationery's Design Team and I've been having fun playing with the gorgeous Bunny Spring Meadow digital junk journal kit. If you know me you know I can't resist a bunny, but for my first makes with the kit I've concentrated on the gorgeous meadow background pages. We've sown our front garden, which is really steep, with a wild flower meadow mix and the poppies have been glorious even in the wet weather we've had this week.
I'm loving the soft colours, wildflowers and butterflies as well as the cute farm and countryside animals in the kit and I've used just one of the beautiful meadow papers to make two "Double Vision" cards. This is a simple but effective technique, where the page is cut into strips and these are adhered to the card base alternately flat and raised on sticky pads.
Friday, 25 February 2022
Bee Journal
I've used the Jenndi Bee-utiful digital kit from Patreon.com/melodimade to make this cute little journal. It's nice to be back to bright colours after all the Christmas crafting!
#MMDREAMTEAM
Cat Mini Journal
A little journal I've made with the Jenndi Purrfection digital kit from Patreon.com/melodimade . It's such a lovely kit I'll be making a larger journal with it too.
Saturday, 22 May 2021
Paper Piecing Tutorial
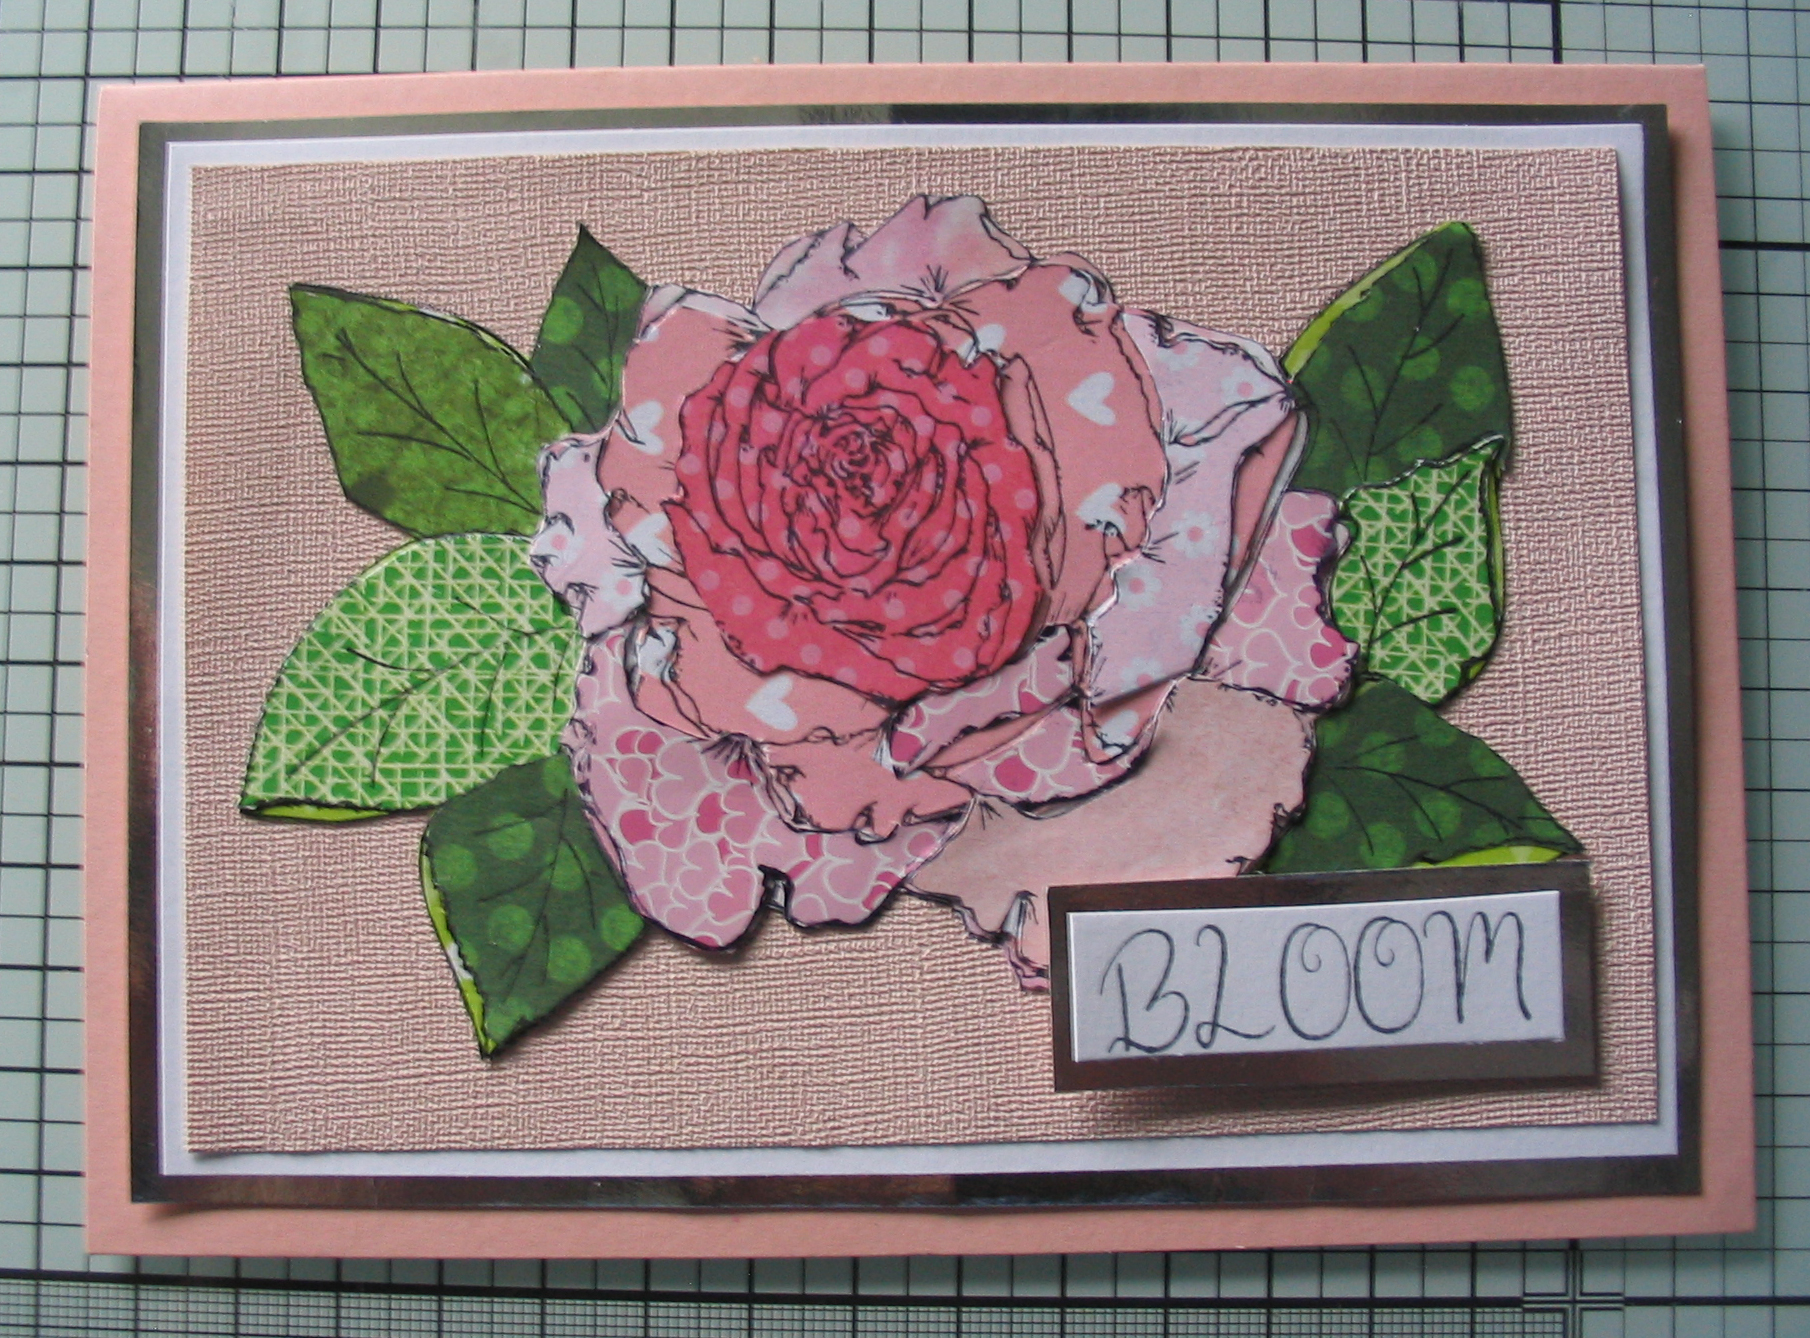
I love paper piecing. It's an easy way to add dimension to a stamped image and makes a change from colouring by hand. It's great for using up scraps of coloured papers. If you don't have a scrap box you can even use magazine pages and adverts to great effect.
You will need:
- A stamp with fairly large sections that lends itself to dividing up the image into different tones. I have used Rose from Artisan Design.
- A sentiment stamp. Mine is from Delicate Primrose from the Artisan Design Butterflies and More Collection.
- A stamping block or stamp positioner.
- Black ink pad (I have used Ranger Archival).
- Background paper. I've used a sample piece of textured wallpaper.
- Scraps of patterned paper in pinks and greens, in a variety of tones from light to dark.
- Small sharp scissors for fussy cutting.
- Card blank and pieces of card for matting and layering.
- Glue that will allow a little movement so you can get the pieces in exactly the right place. I have used Beacon 3-in1 Craft Glue.
Look at the image and decide how you will divide it up into sections with different tones. Choose 3 or 4 (or more if you like) scraps of paper for each colour. You can use quite small pieces as you will only need a small section of the image for most of them. I have used the darkest greens for the back leaves and the darkest pink for the tightly furled centre of the rose.
Stamp the rose onto the background paper. There is a slight sheen to this paper so I heat set the ink to avoid smudging.
You can mask the unwanted parts of the stamp with scrap paper so that you can fit the leaves onto small pieces of paper.
As the rolled edges of the leaves and petals will be the lightest colours to show as highlights, stamp the flower onto the palest pink and the leaves onto the palest green scraps. These will form the base for the assembled image. Stamp partial images onto the remaining scraps, choosing which you want to be light, medium and dark and making sure this section is completely stamped.
Cut out the two leaf sections. Fussy cut the visible edges of the leaves; the rest will be hidden by the flower. Fussy cut the other leaves, removing the curled edge sections so the light base will show as highlights.
Glue the leaves onto the stamped outline and stick the light, medium and dark leaves in place.
Cut out the complete flower from the palest pink and glue this into place over the leaves. Fussy cut the centre in the darkest pink and the individual petals in the medium shades, again trimming off the rolled edges of the petals to reveal the lighter highlights. Glue carefully into place.
The finished flower.
Mat and layer with silver and white card and attach to card base, Stamp a sentiment onto white card and mat with silver; fix onto the card with foam pads.
Tuesday, 17 March 2020
Floral Journal
Thank you for watching, I hope you enjoyed a breath of Spring too.
Wednesday, 12 February 2020
Purple Journal
The cover is a rich pink and silver fabric and the journal is Traveller's Notebook size with 3 removable signatures and there are silvery bells on the spine tassel. There are lots of journalling spots and tags throughout and I'm really pleased with how it turned out.
Thank you for looking!
Monday, 20 January 2020
Butterfly Dancer samples for Artisan Design Group UK
Here's what I've created for the design team using "Mason" and "Jorjie" - watch the shows tomorrow and see if you can spot any of my makes!
![]() |
| Card with Mason and Spotted background |
![]() |
| Jorjie on a smooshed Distress Oxide background |
![]() |
| A little notebook with Brusho background and Mulberry paper |
![]() |
| Inside the notebook with some of the "worker" stamps in Mason's set |
![]() |
| I liked the worker stamps so much I used them to make a card with Distress Oxide on photo paper background |
![]() |
| A mixed media tag using Jorjie on a collaged bookpaper background and added texture using the Laurel Burst stencil and texture paste. |
![]() |
| A canvas with Starlight metallic paints and Daisy Burst stencil, with Fern stamped onto vellum. |
![]() |
| Easel card using Artisan Design Veiny texture stamp and Mason |
![]() |
| Sparkly embossed Jorjie on Daisy Burst stencilled background and resin flowers |
![]() |
| Jorjie again, this time on a shaker card. |
Saturday, 21 December 2019
Winter's Kiss envelope
In the same post was a nice large envelope, so I used the Artisan Design Snowflake mask to make a pretty background for the rose and the wording, and trimmed it with some glittery washi tape. Quick and easy but I think it's so pretty, and I'll add it to a Christmassy journal I've started creating.
Friday, 20 December 2019
Christmas Carol Challenge and Swap

These are my makes for the challenge. My card is "In the Bleak Midwinter" with some suitably wintry looking deer and a village scene, and for my mixed media piece I took a canvas board and used Distress Oxides on photo paper to give a stone effect for Scrooge's headstone. The lettering was done by hand. In both I have used the Artisan Design Snowflake mask and Distress Oxides as a background, and in the Scrooge one I've used the AD Fern stamp to add some foliage round the stone. Flock made a nice snowy effect on both.I was lucky enough to be a winner in the challenge and received this wonderful prize of a set of Faber Castell watercolour pencils.


