Showing posts with label Stamping. Show all posts

Saturday, 22 May 2021

Paper Piecing Tutorial

I love paper piecing. It's an easy way to add dimension to a stamped image and makes a change from colouring by hand. It's great for using up scraps of coloured papers. If you don't have a scrap box you can even use magazine pages and adverts to great effect.


You will need: 

  • A stamp with fairly large sections that lends itself to dividing up the image into different tones. I have used Rose from Artisan Design.
  • A sentiment stamp. Mine is from Delicate Primrose from the Artisan Design Butterflies and More Collection.
  • A stamping block or stamp positioner.
  • Black ink pad (I have used Ranger Archival).
  • Background paper. I've used a sample piece of textured wallpaper.
  • Scraps of patterned paper in pinks and greens, in a variety of tones from light to dark.
  • Small sharp scissors for fussy cutting.
  • Card blank and pieces of card for matting and layering.
  • Glue that will allow a little movement so you can get the pieces in exactly the right place. I have used Beacon 3-in1 Craft Glue.


Look at the image and decide how you will divide it up into sections with different tones. Choose 3 or 4 (or more if you like) scraps of paper for each colour. You can use quite small pieces as you will only need a small section of the image for most of them. I have used the darkest greens for the back leaves and the darkest pink for the tightly furled centre of the rose.


Stamp the rose onto the background paper. There is a slight sheen to this paper so I heat set the ink to avoid smudging.


You can mask the unwanted parts of the stamp with scrap paper so that you can fit the leaves onto small pieces of paper.


As the rolled edges of the leaves and petals will be the lightest colours to show as highlights, stamp the flower onto the palest pink and the leaves onto the palest green scraps. These will form the base for the assembled image. Stamp partial images onto the remaining scraps, choosing which you want to be light, medium and dark and making sure this section is completely stamped.


Cut out the two leaf sections. Fussy cut the visible edges of the leaves; the rest will be hidden by the flower. Fussy cut the other leaves, removing the curled edge sections so the light base will show as highlights. 


Glue the leaves onto the stamped outline and stick the light, medium and dark leaves in place.


Cut out the complete flower from the palest pink and glue this into place over the leaves. Fussy cut the centre in the darkest pink and the individual petals in the medium shades, again trimming off the rolled edges of the petals to reveal the lighter highlights. Glue carefully into place.


The finished flower.
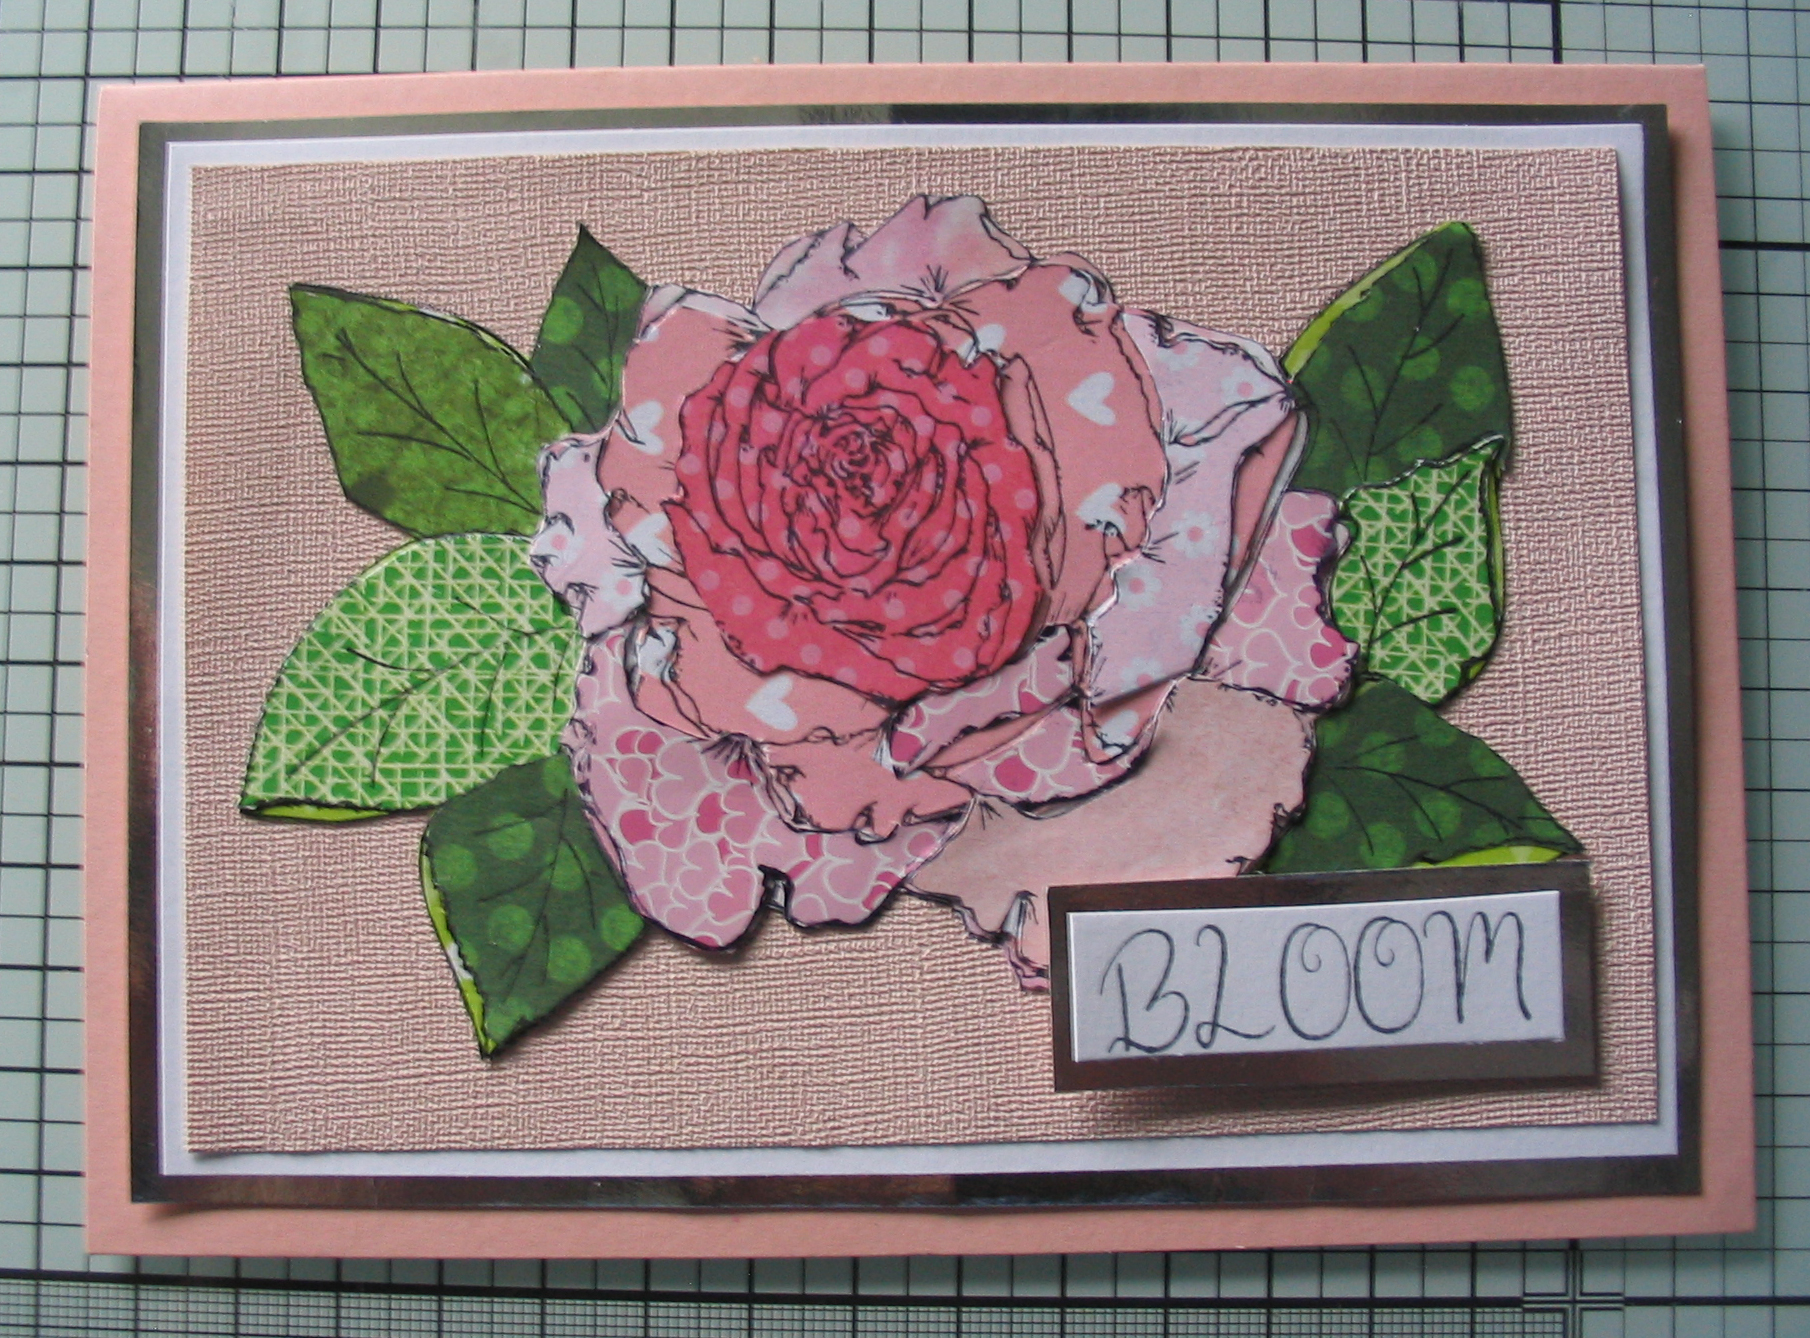

Mat and layer with silver and white card and attach to card base, Stamp a sentiment onto white card and mat with silver; fix onto the card with foam pads.


Monday, 20 January 2020

Butterfly Dancer samples for Artisan Design Group UK

On Tuesday 21st January on Hochanda (Home of Crafts, Hobbies and Art), Pete Simpson of Artisan Design will be launching his created licensed designed stamps: The Butterfly Dancers: Now available for pre-order in either mounted and unmounted formats at https://www.artisandesigngroupuk.com

Here's what I've created for the design team using "Mason" and "Jorjie" - watch the shows tomorrow and see if you can spot any of my makes!
Card with Mason and Spotted background

Jorjie on a smooshed Distress Oxide background

A little notebook with Brusho background and Mulberry paper 

Inside the notebook with some of  the "worker" stamps in Mason's set

I liked the worker stamps so much I used them to make a
card with Distress Oxide on photo paper background

A mixed media tag using Jorjie on a collaged bookpaper
background and added texture using the Laurel Burst
 stencil and texture paste.

A canvas with Starlight metallic paints and Daisy Burst stencil, with
 Fern stamped onto vellum.

Easel card using Artisan Design Veiny texture stamp and Mason

Sparkly embossed Jorjie on Daisy Burst stencilled background and resin flowers

Jorjie again, this time on a shaker card.

Saturday, 3 November 2018

Day of the Dead ATC Coins

If you like making ATCs (Artist Trading Cards) you'll love the new Artist Trading Coins!  2 1/2" circles instead of 2 1/2" x 3 1/2" rectangles but the principle is the same.  They're great for trying out new techniques too!

These are my first Coins, made for a RAK Challenge on the NJJM Facebook recently.  The theme was "freestyle" but as I was making mine at the end of October I used a free cover stamp from Craft Stamper magazine and went with a Dia de los Muertos theme.


I printed off a distressed purple damask pattern background paper, die cut it into coins, added a glitter glue spider's web, some book paper and a strip of script washi tape.  Then I stamped and coloured my skulls, fussy cut them and popped them on the top.  They are now winging their way to Australia, but I made myself an extra one so I can keep one myself, as I realised that I hardly have any of my own makes as they are mostly swaps and presents.

Friday, 22 June 2018

Colour themed ATCs

I have had some mixed media fun with the ATC swap on the My Make Forum this month.  The brief was: three ATCs, all mainly the same colour.

I chose aqua as I'd just bought some aqua metallic paint from our new local craft shop and wanted to try it out!

The first one has a collaged paper background edged in Peacock Feather Distress Oxide.  I mixed some of the metallic paint with Grunge Paste through a starry stencil, and once it dried I overstamped in black archival with more stars and a sentiment, and finished off with a star sequin.

The middle ATC has a Distress Oxide background of Peacock Feather and Cracked Pistachio.  I used the blended Grunge Paste as before but with a butterfly and stars stencil, then added some patterning to the butterfly's wings with metallic pen and some tiny sequins. Again I finished with a couple of stamped sentiments and some sequins in different shades of aqua.

The final ATC has a patterned paper background, inked with Peacock Feather, and I used the Grunge Paste through a HOTP feather stencil.  Again I coloured in detail with a metallic pen, stamped and added sequins as before.

They are now on their way to the States for a swap, who knows where they will finally end up?