I love paper piecing. It's an easy way to add dimension to a stamped image and makes a change from colouring by hand. It's great for using up scraps of coloured papers. If you don't have a scrap box you can even use magazine pages and adverts to great effect.

You will need:
- A stamp with fairly large sections that lends itself to dividing up the image into different tones. I have used Rose from Artisan Design.
- A sentiment stamp. Mine is from Delicate Primrose from the Artisan Design Butterflies and More Collection.
- A stamping block or stamp positioner.
- Black ink pad (I have used Ranger Archival).
- Background paper. I've used a sample piece of textured wallpaper.
- Scraps of patterned paper in pinks and greens, in a variety of tones from light to dark.
- Small sharp scissors for fussy cutting.
- Card blank and pieces of card for matting and layering.
- Glue that will allow a little movement so you can get the pieces in exactly the right place. I have used Beacon 3-in1 Craft Glue.

Look at the image and decide how you will divide it up into sections with different tones. Choose 3 or 4 (or more if you like) scraps of paper for each colour. You can use quite small pieces as you will only need a small section of the image for most of them. I have used the darkest greens for the back leaves and the darkest pink for the tightly furled centre of the rose.

Stamp the rose onto the background paper. There is a slight sheen to this paper so I heat set the ink to avoid smudging.

You can mask the unwanted parts of the stamp with scrap paper so that you can fit the leaves onto small pieces of paper.

As the rolled edges of the leaves and petals will be the lightest colours to show as highlights, stamp the flower onto the palest pink and the leaves onto the palest green scraps. These will form the base for the assembled image. Stamp partial images onto the remaining scraps, choosing which you want to be light, medium and dark and making sure this section is completely stamped.

Cut out the two leaf sections. Fussy cut the visible edges of the leaves; the rest will be hidden by the flower. Fussy cut the other leaves, removing the curled edge sections so the light base will show as highlights.

Glue the leaves onto the stamped outline and stick the light, medium and dark leaves in place.

Cut out the complete flower from the palest pink and glue this into place over the leaves. Fussy cut the centre in the darkest pink and the individual petals in the medium shades, again trimming off the rolled edges of the petals to reveal the lighter highlights. Glue carefully into place.

The finished flower.
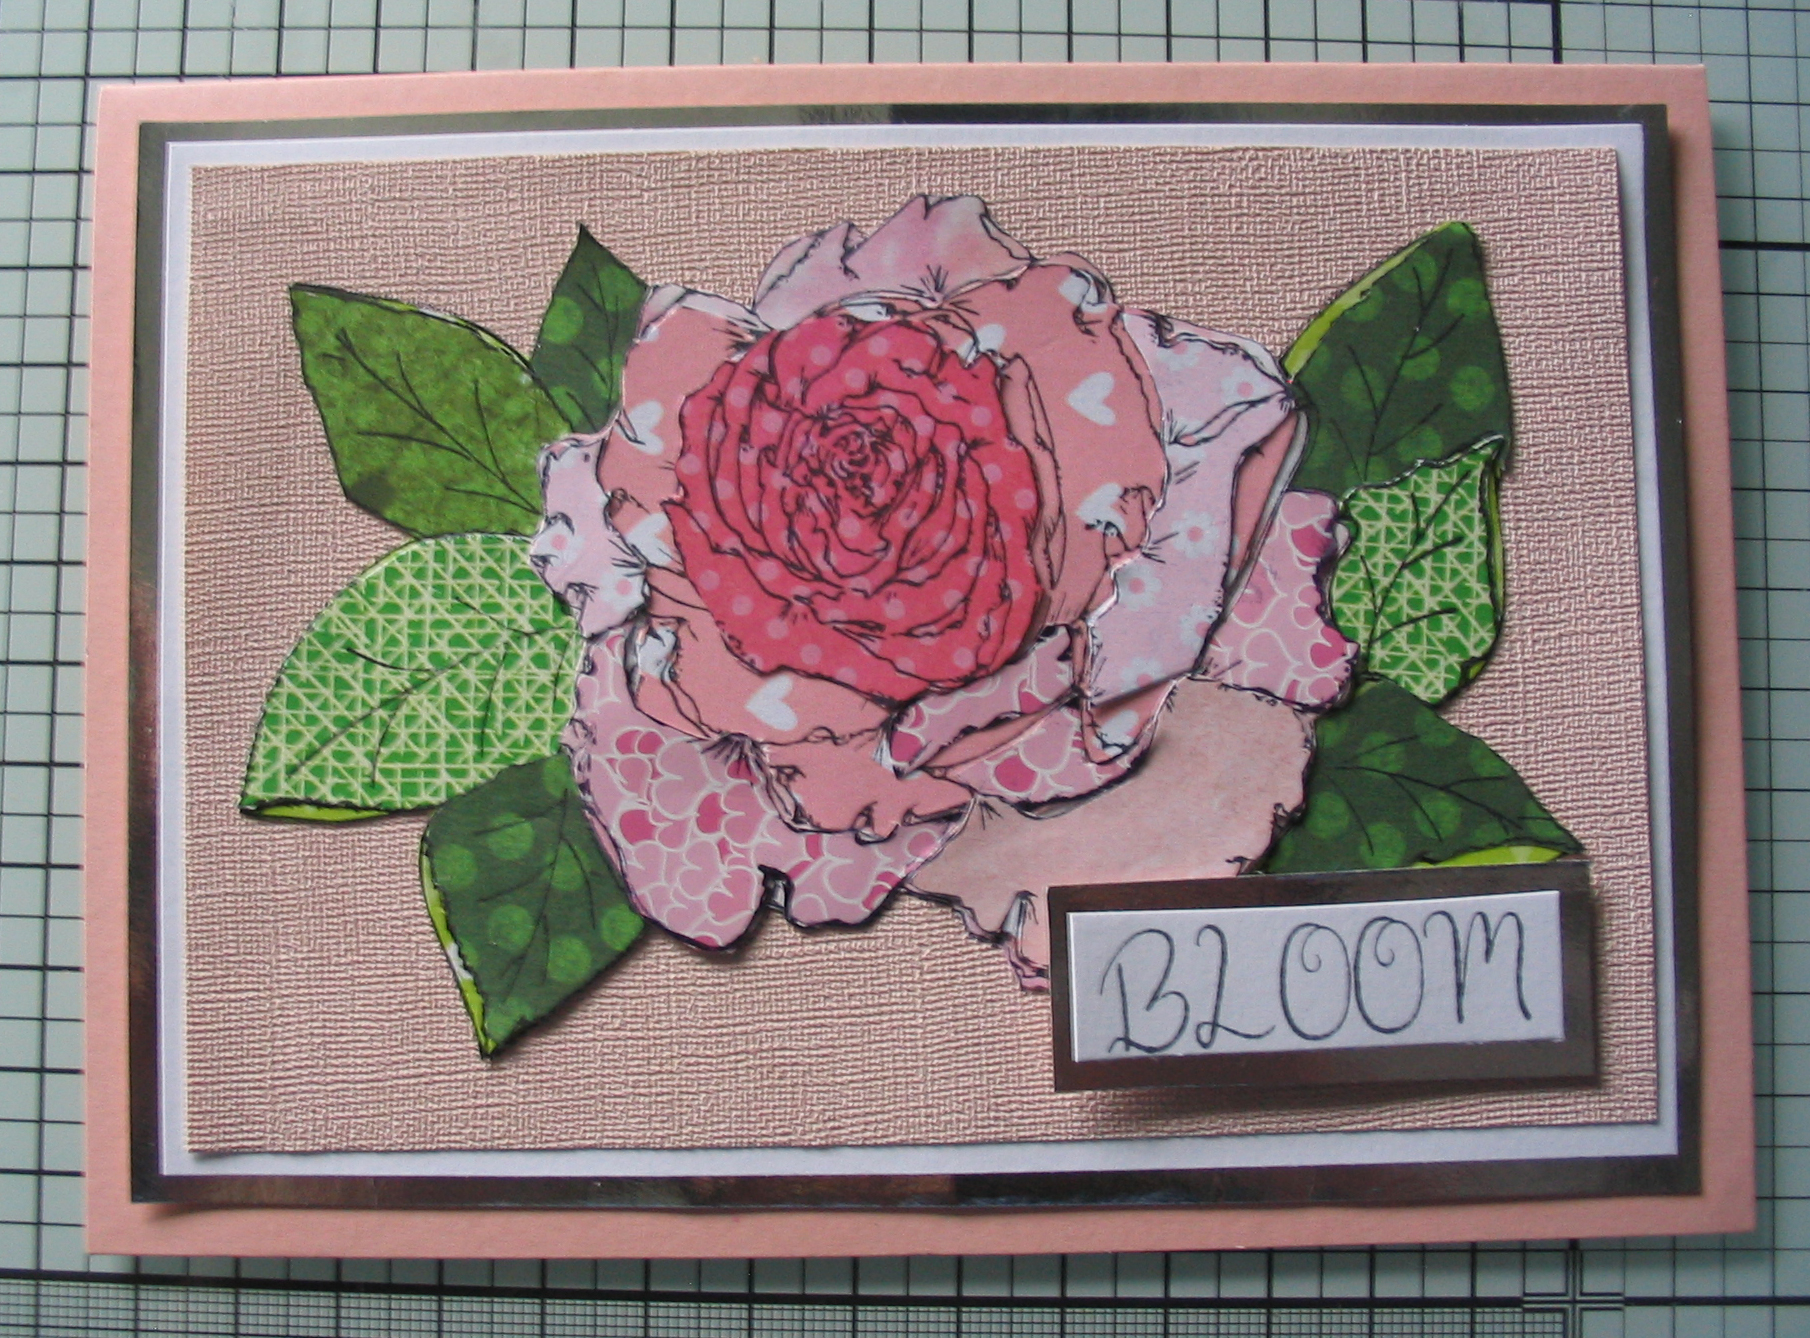
Mat and layer with silver and white card and attach to card base, Stamp a sentiment onto white card and mat with silver; fix onto the card with foam pads.


